Hello world of Flipper Zero
Creating a Hello World app for Flipper Zero
What is Flipper Zero?
"Flipper Zero is a portable multi-tool for pen-testers and geeks in a toy-like body." ~FlipperZero.com
This little device is packed with many features, if you want to know more head to my previous article Flipper Zero - A developer's first look
One of the most interesting features of 🐬 Flipper Zero is
It's fully open-source and customizable, so you can extend it in whatever way you like.
Extending the capabilities of Flipper Zero requires some knowledge of C and the building system of the Flipper Zero firmware.
Let's see how to start building apps for Flipper Zero 👨💻👩💻.
Flipper Zero app development
Apps built for Flipper Zero are located inside the directory applications_user/. The general folder structure for plugins / apps is the following:
./flipperzero-firmware
├── applications
├── applications_user
│   └── %YOUR APP HERE%
|       └──  application.fam (the manifest file)
|       └──  Code, header files, and assets
├── assets
├── debug
├── documentation
├── firmware
├── furi
├── lib
├── scripts
└── site_scons
To build our first Hello World project, let's create a new folder inside the user apps directory:
$ cd applications_user/
$ mkdir helloflipper
Creating your app's manifest file
Apps in Flipper are developed in C and require a manifest file to define the basic attributes and its relationship with the overall system (note: the same goes for plugins, services, and s-system settings). FBT will use the manifest to build the app as intended.
Step 1: Create a new file named application.fam in the helloflipper directory.
Step 2: Insert the following Python code into the application.fam file:
App(
    appid="helloflipper",
    name="Hello flipper",
    apptype=FlipperAppType.EXTERNAL,
    entry_point="helloflipper_main",
    requires=["gui"],
    stack_size=1 * 1024,
    fap_category="Examples",
    fap_icon_assets="images",
)
Step 3: Add image assets
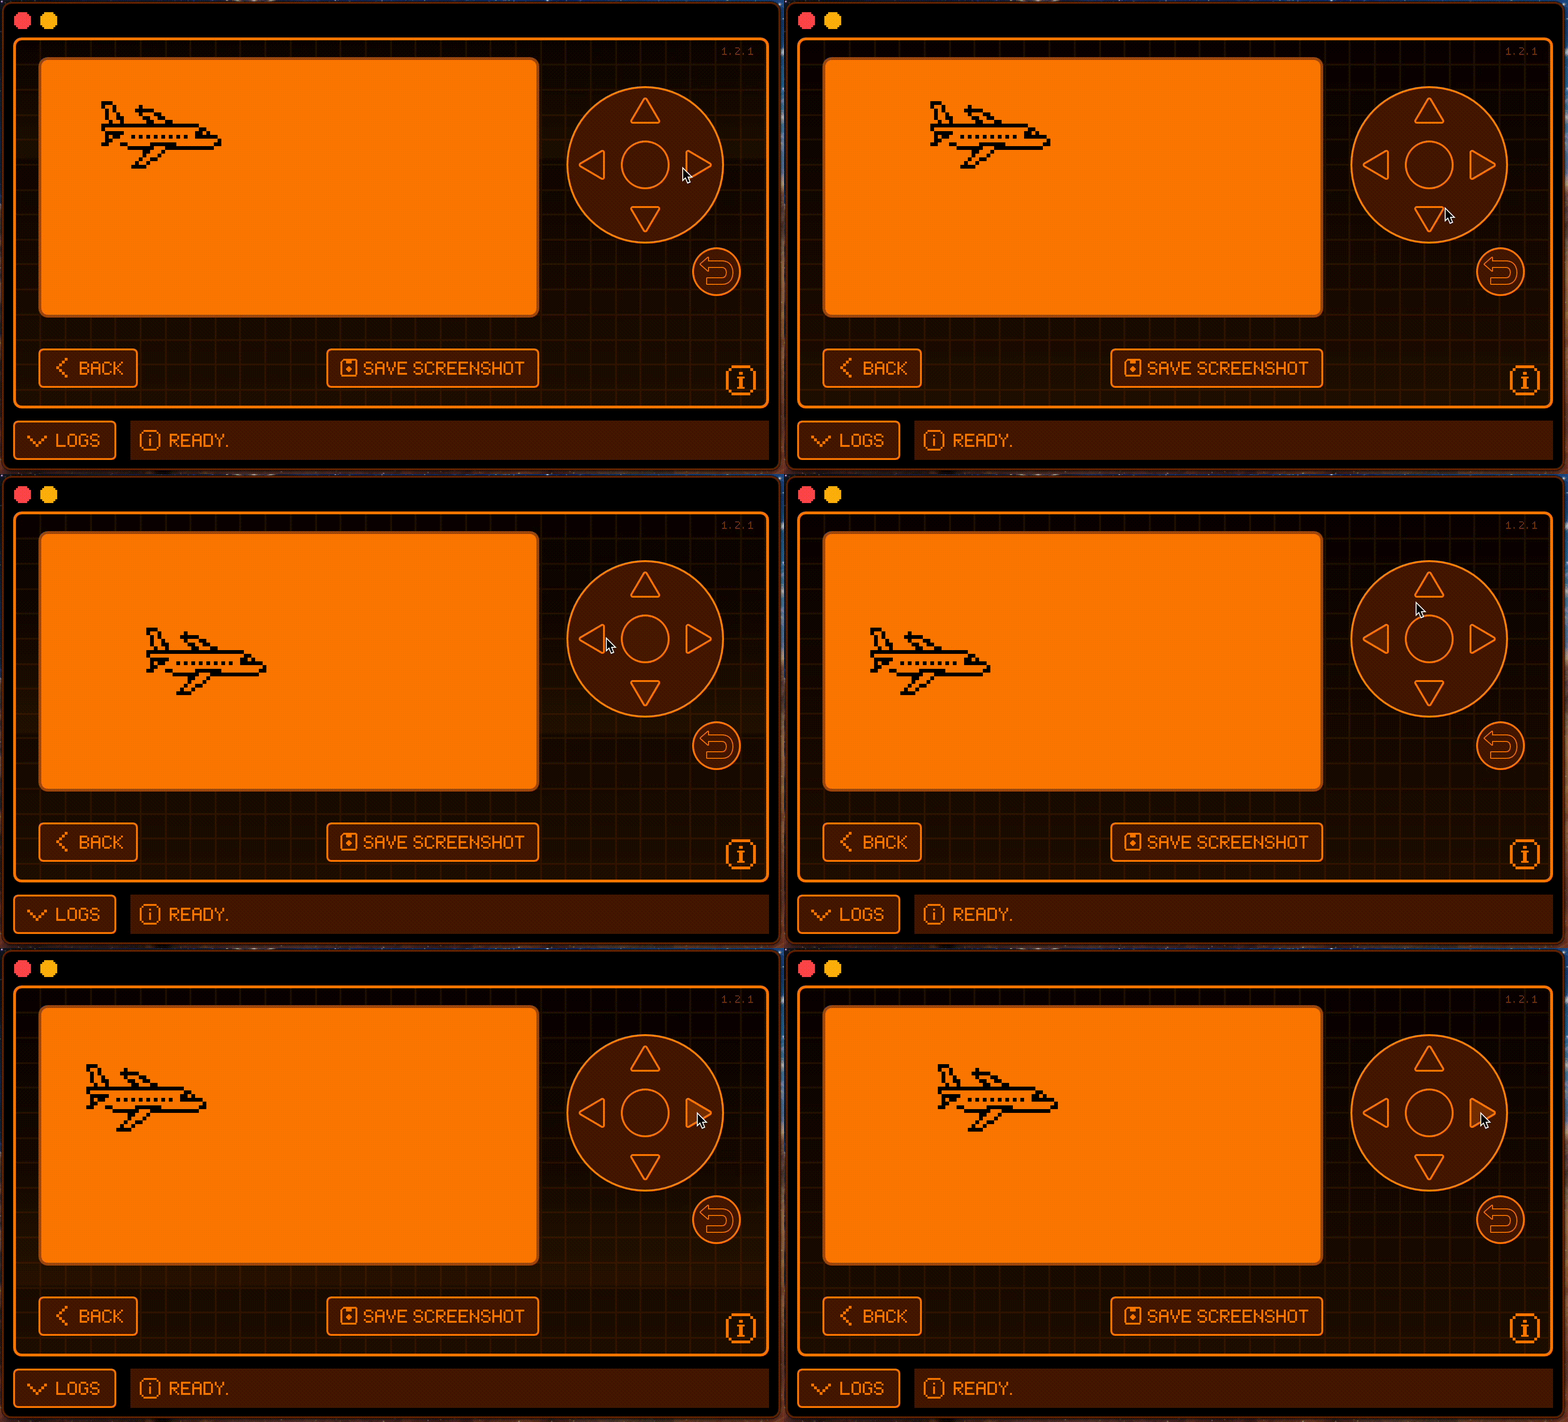
Now that we've created the apps entry point and directory, we can start coding. Our Hello World app will display a little airplane that can move around the built-in display using the Flipper's control pad.

Since transparency is not supported in Flipper's display, we'll use a non-transparent png image as the "sprite" for the airplane:

Inside the app's directory run the following commands:
$ pwd
../flipperzero-firmware/applications_user/helloflipper
$ mkdir images
$ cd images
$ mv [..]/airplane.png .
Step 4: Creating the app's entry point
After moving the sprite into the image assets folder, go ahead and create the helloflipper.c file as the app's entry point:
$ cd ../
$ touch helloflipper.c
Here in this helloflipper.c file we will now begin to define our app's data model.
Managing state & the screen coordinates
In order to control the screen position for our airplane, we must store the x and y coordinates.
Step 1: Storing the sprite coordinates
Create the ImagePosition struct and initialize a variable of this type containing the x and y coordinates:
typedef struct {
    uint8_t x, y;
} ImagePosition;

static ImagePosition image_position = {.x = 0, .y = 0};
To import the airplane image, we include this line on the head of our source file:
#include "helloflipper_icons.h"
By using this, we will be able to use our resource image by using I_
Step 2: Adding the C headers
This is the time also to include all the headers that we will need: Access to the GUI, the input controls, and the flipper zero API:
#include <furi.h>
#include <furi_hal.h>

#include <gui/gui.h>
#include <input/input.h>
(Note: 'furi' is short for Flipper Universal Registry Implementation, which helps control application flow and dynamic linking between apps)
Step 3: Building the functionality
Our main function is referenced as:
int32_t helloflipper_main(void* p)
You'll rememberhelloflipper_main serves as the entry point of our app since it was specified in the application.fam as an attribute:
entry_point="helloflipper_main",
Because we don't use the parameter p in our hello world, we have to invoke the macro UNUSED(p) in order to not signal an error during the build steps:
int32_t helloflipper_main(void* p) {
    UNUSED(p);
Step 2: Managing the event queue and Viewport
Now we need to declare our event queue, which is responsible for storing incoming events from the directional pad, such as the user pressing left, right, up, down, etc...
As a type for the event queue, we use FuriMessageQueue, specified in the furi API.
int32_t helloflipper_main(void* p) {
    UNUSED(p);
    FuriMessageQueue* event_queue = furi_message_queue_alloc(8, sizeof(InputEvent));
Then we have to use another important object in the Flipper Zero system: the ViewPort. This object is responsible to handle the frame updates (i.e. "what happens on screen") and the input events.
To instruct the viewport on what to do in these cases we need to define the two callbacks:
static void app_draw_callback(Canvas* canvas, void* ctx) {
    UNUSED(ctx);

    canvas_clear(canvas);
    canvas_draw_icon(canvas, image_position.x % 128, image_position.y % 64, &I_airplane);
}

static void app_input_callback(InputEvent* input_event, void* ctx) {
    furi_assert(ctx);

    FuriMessageQueue* event_queue = ctx;
    furi_message_queue_put(event_queue, input_event, FuriWaitForever);
}
Step 3: Re-drawing & callback methods
The app_draw_callback method is used to update the screen each time it's executed and will clear the canvas to re-draw the airplane image to match the coordinates stored in image_position.
In addition, app_input_callback will help get InputEvent and place it in the queue we defined.
💡 We are ready now to instantiate the viewport and set callbacks:
int32_t helloflipper_main(void* p) {
    UNUSED(p);
    FuriMessageQueue* event_queue = furi_message_queue_alloc(8, sizeof(InputEvent));

    // Configure viewport
    ViewPort* view_port = view_port_alloc();
    view_port_draw_callback_set(view_port, app_draw_callback, view_port);
    view_port_input_callback_set(view_port, app_input_callback, event_queue);
Step 4: Registering the Viewport
Afterwards, we need to register the viewport with the GUI manager using these lines of code:
int32_t helloflipper_main(void* p) {
    UNUSED(p);
    FuriMessageQueue* event_queue = furi_message_queue_alloc(8, sizeof(InputEvent));

    // Configure viewport
    ViewPort* view_port = view_port_alloc();
    view_port_draw_callback_set(view_port, app_draw_callback, view_port);
    view_port_input_callback_set(view_port, app_input_callback, event_queue);

    // Register viewport in GUI
    Gui* gui = furi_record_open(RECORD_GUI);
    gui_add_view_port(gui, view_port, GuiLayerFullscreen);
Creating the loop & refreshing the screen with key inputs
After listening for events, we need to create the app's loop. At every run of this loop, we will get an event from the input queue. The app should check if the event is a key press or long key press and change the image_position x or y depending on which key has been pressed.
After we update the coordinates we order an update to the viewport:
InputEvent event;

bool running = true;
    while(running) {
        if(furi_message_queue_get(event_queue, &event, 100) == FuriStatusOk) {
            if((event.type == InputTypePress) || (event.type == InputTypeRepeat)) {
                switch(event.key) {
                case InputKeyLeft:
                    image_position.x -= 2;
                    break;
                case InputKeyRight:
                    image_position.x += 2;
                    break;
                case InputKeyUp:
                    image_position.y -= 2;
                    break;
                case InputKeyDown:
                    image_position.y += 2;
                    break;
                default:
                    running = false;
                    break;
                }
            }
        }
        view_port_update(view_port);
    }
Since we're working in C, we have to make sure we clean up memory and reset the system back to where we began. To do this we disable the viewport, remove it from the GUI, de-allocate the resources, close the GUI, and return 0:
    view_port_enabled_set(view_port, false);
    gui_remove_view_port(gui, view_port);
    view_port_free(view_port);
    furi_message_queue_free(event_queue);

    furi_record_close(RECORD_GUI);

    return 0;
Build and run the hello world app
To build the app we have to run from the main directory using the following syntax:
$ ./fbt fap_"appname"
For our hello world example, we'll run the following command:
./fbt fap_helloflipper
Launching the hello world app
Once this runs (and if there's no error!), we can launch our new app in the Flipper Zero with this command:
./fbt launch_app APPSRC=applications/helloflipper
The app is live and we can move our airplane on the Flipper Screen using the control pad. In addition, we can exit the app by pressing the back button:

You can check the code at github.com/giolaq/helloflipper.
Conclusion
I look forward to what you build with the Flipper Zero. In the next article of the series we will develop an app able to get data from the antennas. Stay Tuned!
If you have questions or looking to build something new, you can reach me on Twitter or in the Discord community for Flipper Zero.
Have fun and happy hacking!

